
Thumbnails. Such an extraordinarily helpful tool! And yet, so resisted. So misunderstood. So avoided! Students often say, “I just want to get to the painting! By the time I’ve done a thumbnail, I won’t have the energy to do the painting.” And this stance is particularly espoused when it comes to making thumbnails en plein air. For me though, at this point in my painting life, I cannot imagine starting a representational piece without doing at least one thumbnail, whether in studio or on location!
Creating a thumbnail (or two) is a fast way to:
- Understand what it is you want to paint (there’s so much to choose from!)
- Compose your painting before putting pastel to paper or paint to canvas/board
- Create a pattern/design of three values – the underpinning of your painting
- Become familiar with your subject
Thumbnails are quick, small explorations of the painting possibilities. Sometimes a thumbnail may even show you that what you thought you wanted to paint isn’t the subject for you right now.
So yes, I create thumbnails en plein air, even as I recognise that the scene (especially the light) is changing moment by moment and time is of the essence. I wouldn’t dream of skipping this oh-so-valuable step!
Let me take you through a few pieces done recently on location in La Manzanilla, Mexico. You’ll see the scene as I saw it and then, through my thumbnails, the part of the scene I chose to paint. You’ll also see the final painting.
Let’s go!
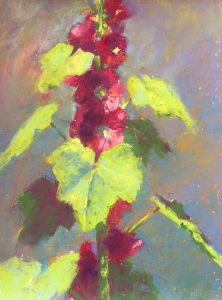
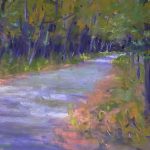
This gorgeous purple wall was just around the corner from where we were staying. (You can read an earlier post about how I got past the resistance that arose around painting en plein air while in Mexico.) It stopped me in my tracks. And oh that cast shadow thrown by the mango tree!

You’ll see in my sketchbook that I began a horizontal thumbnail. But as I worked, I realised what I wanted to focus on was the transition from the cast shadow to the sunlit wall along with the bicycle. So I started another thumbnail – a vertical one.

When I chose this scene, I knew that at any moment, the bicycle might be ridden away. I took that risk and got lucky – it stayed put the entire painting time!

I was pretty enamoured with that wall. (As an aside, I was a bit frustrated that I didn’t have the colours in my Unison Colour 36-piece set to do it justice. So I let go of replicating that specific purple colour and focused on value differences and creating a warm coloured wall!)
The next piece is back at that same purple wall. But this time, it was the dogs that lay about that also caught my attention. They mostly seemed to stick to the cast shadows. The bike added another note of interest.
Here’s the scene (without any dogs as it turns out!).

You can see in my thumbnail that I compressed the view, bringing the bottom shadow in closer to the rest of the scene. It felt it was important to have that shadow running across the bottom of the piece. You can also see in my thumbnail that I thought of including an outlier – a dog sitting in the hot sun but crossed it out. The dog moved after I drew it in and I decided to stick with dogs in the shade. (Isn’t there some saying about Mad Dogs and Englishmen…?

And then the painting. Near the end of working on it, a dog suddenly dropped down in front of me and I quickly put it in. I love those serendipitous moments that happen when painting on location! By this time, the sun was behind a huge cloud and the scene stayed overcast for the rest of my painting time. However, having created thumbnails, I had a record of the light, dark, and grey pattern. Luckily, I’d also gotten down quite a bit of colour. The scene looks so grey without the sunlight!!


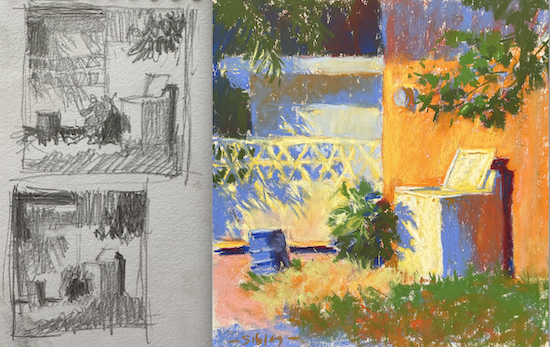
Next there’s the scene with an outdoor (abandoned?) washing machine. The specific thing that caught my attention here was the reflected light thrown by the orange building onto the machine.
As the washing machine was the main reason for stopping, I wanted it to take up a major part of the painting. So in my thumbnail, I cropped out a lot of the surrounding area. And I decided on a square format. I also liked the cast shadows on the wall in the background – a lovely blue contrast to the orange wall. Still, I was unsure of how much to include. This is where creating thumbnails en plein air is invaluable! They help you make decisions on composition so much more easily. You can see I did another thumbnail to really clarify the design of the big shapes of three values. This is the stage where I can tell whether a composition has a chance of working.

With the format, composition, and value pattern decided, I could now have fun with the colour!

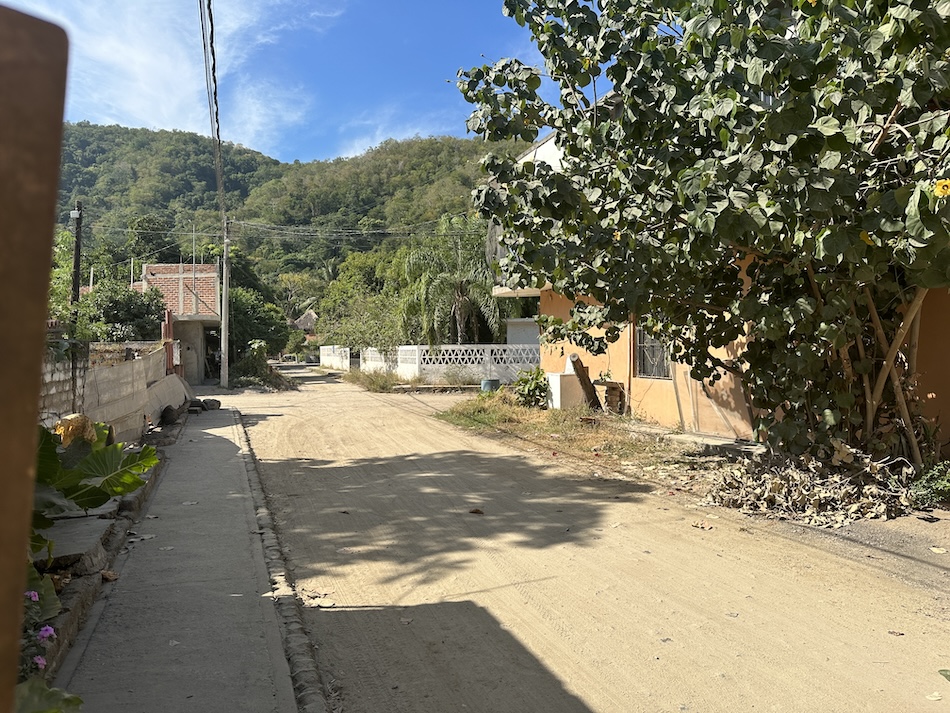
Lastly, there’s this fairly nondescript scene.

There’s something in the pattern created by the tree’s cast shadow and the small areas of dark that made me stop and get out my sketchbook. Again, I decided to crop in close to tell the story of this small corner of La Manzanilla, probably one that’s ignored by most passersby.
In my thumbnail. You can see how I move things around to suit my needs. An example is the bush by the post. I’ve also compressed all the parts to fit into the square format. And I’ve deleted much of the overhanging tree branches.
As an artist, you have the power to make these changes. Creating thumbnails en plein air allows me to sort these ideas out before I commit to putting a mark on the surface of my painting.

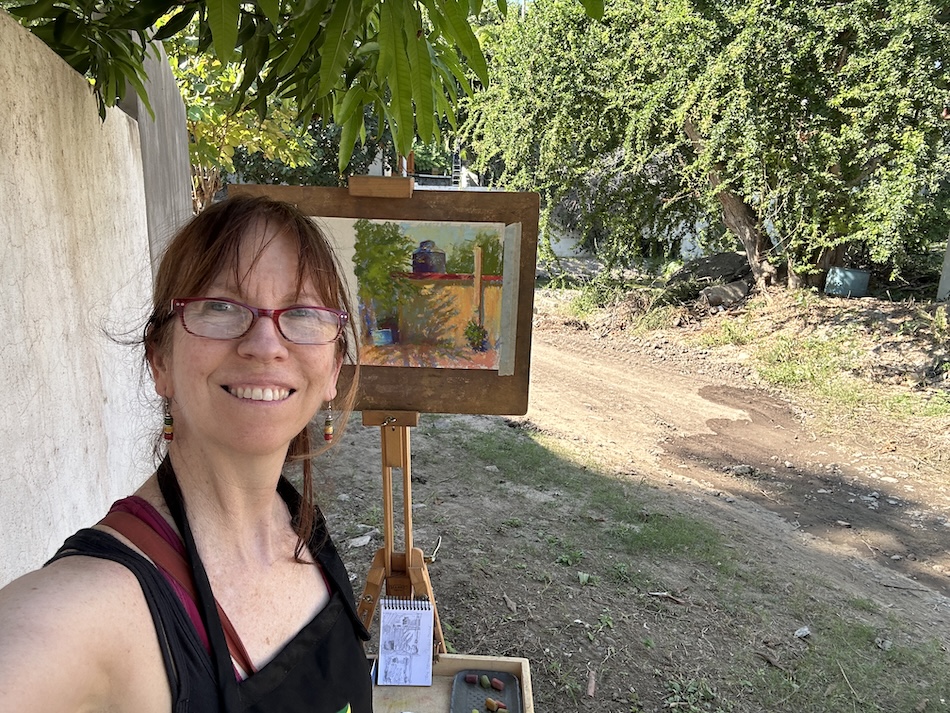
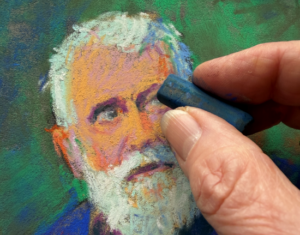
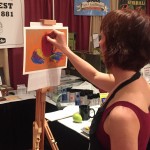
And here’s the painting! You can see in the second image (of me with the painting) that my small sketchbook with the thumbnails of the scene are fully visible. I always keep my thumbnails front and centre as I find it’s easy to lose my way, wandering away from my original design if I’m not careful!

I mentioned earlier that creating thumbnails en plein air can also prevent you from wasting time on a painting that doesn’t have a strong enough foundation and will most likely be a disappointment. I always say, if the thumbnail doesn’t excite you/please you, don’t start painting! Colour won’t improve on a black, grey, and white design that isn’t working.
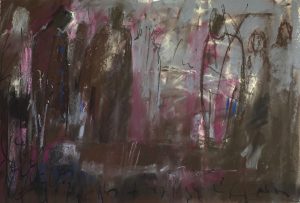
Here’s a thumbnail I did of a scene I liked. I soon realised however that I would need to return at a different time of day for a better pattern of darks, lights, and greys. What I produced didn’t excite me at all – it was a bit of a dud! You can see I even tried extending it on both sides to see if there was a way to make it work. Nope!

My thumbnails are small. I don’t take a lot of time with them. Like you, I want to get to the painting part! And, working en plein air has the added stress of coping with an environment that’s always in the process of changing which means we don’t want to waste any time. But doing thumbnails is the best use of your time!
I hope you can see how creating thumbnails en plein air is actually a benefit rather than a hindrance. I’d love to know your thoughts so please do leave a comment.
That’s it for this time!
Gail


6 thoughts on “Creating Thumbnails En Plein Air (My Mexico Paintings)”
I love how you add such vivacious color to your paintings — this alone makes me want to say that color can revitalize even the most uninteresting foundation.😸
Thanks Serene!!
Colour can certainly make a rather ordinary scene something more than it appears. And, it helps to have the foundational decisions from the thumbnails!!
Hi Gail – thank you, this has been really useful for me . . . I’ve only just started to ‘build up the courage’ to try plein air sketching/painting. Well, I’ve thought about it for months, but only in the last week or so, have I started to put my thoughts in to action!
I’ve managed to get to the sketching phase while staying warm enough to do so, then going home to paint.
However, I’ve never thought, until now, how important and useful thumbnails are.
I’ve also taken a photo before I leave to help me remember the colours and wondered if this is something you also do?
Again, thank you so much for your guidance . . . Lynn x
Going on location is not for the faint of heart. So brava Lynn!! 👏
And yes, those wee thumbnails have so much to offer us on our painting experience!
I often take a photo at the start (after I’ve done the thumbnail) as that’s what I am painting. I try to stick with my original design as the sun moves but sometimes, we chase the sun anyway! A photo at the end is a good idea too because often, back in the studio, when you compare start and end photos, you’ll see just how much the scene changed as you painted.
Your words about thumbnails have definitely gotten me more in the habit of doing them. Thanks for pushing this agenda, it really does help.
Thanks MaryAnn! I’m glad to hear this!